Why Your Facebook Ads Need a Pixel
There are no two ways about it; if you’re paying for advertising on Facebook or Instagram, you need a Facebook Pixel installed on your website.
Facebook has highlighted a few benefits of installing a Facebook Pixel, one of which is to “Drive more sales.” They’re not wrong, but that’s an oversimplification.
A Facebook pixel provides many benefits, including the ability to build a website retargeting audience (your most profitable audience) and measure which ads, audiences and campaigns are actually performing so you can feel confident that you’re getting a return on your investment. I’ve broken it down into three simple steps for you below!
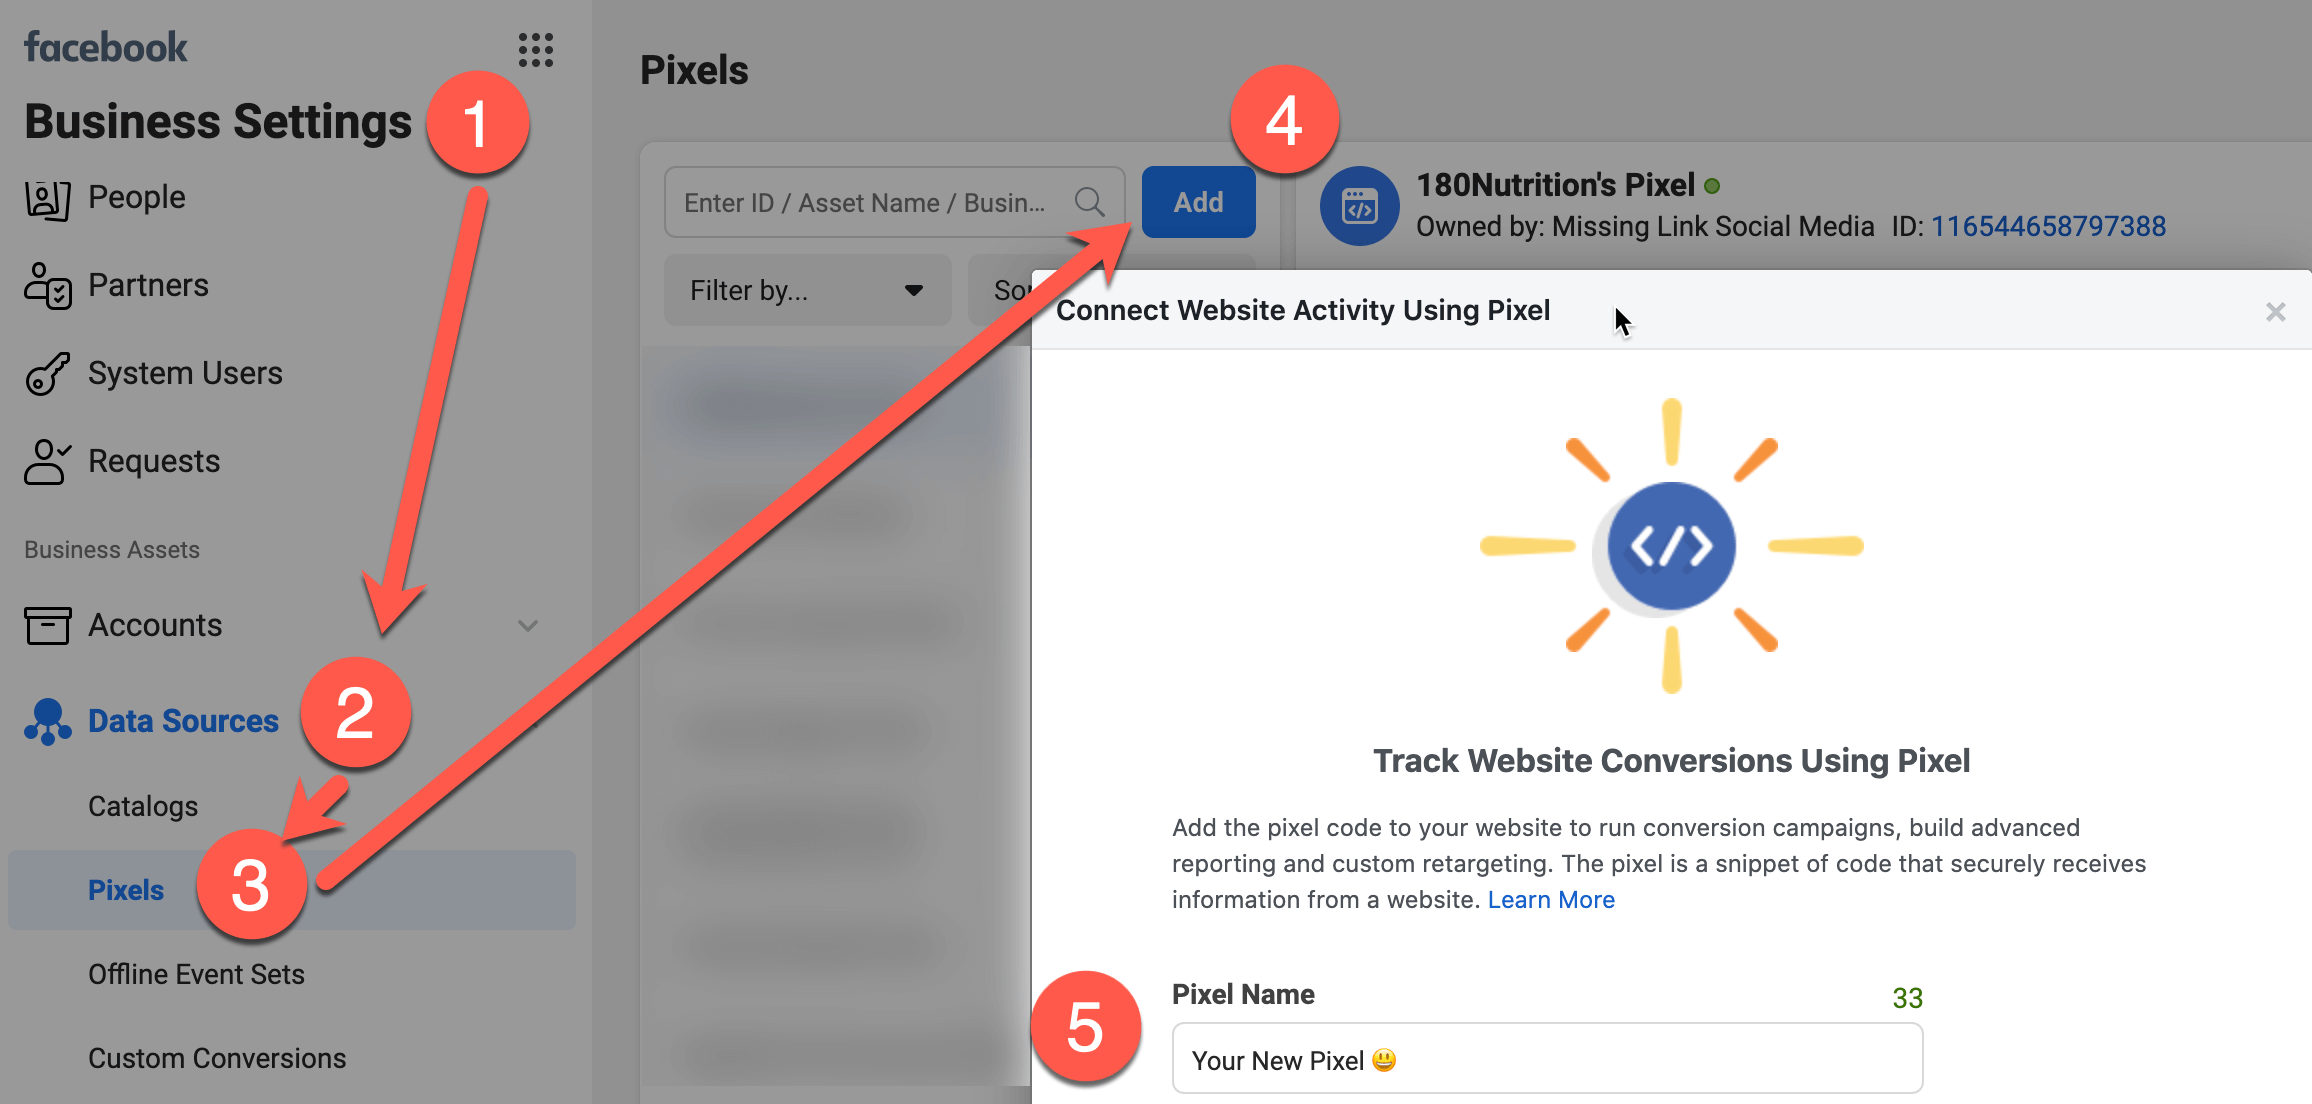
1. Get a Facebook Pixel
A Facebook Pixel is a free piece of code that Facebook gives you that can be created via your Facebook Events Manager.
Once you’ve created the pixel, it needs to be installed into your website, which can be achieved through a variety of methods including:
- Downloading a free website plugin, such as PixelYourSite
- Google Tag Manager (which is how we do it)
- Giving it to your web developer and they can manually add the pixel code to your website
- If you’re using a website builder, such as Wix, or eCommerce solution such as Shopify, all you’ll need is your Facebook Pixel ID
You can check if your Facebook pixel has been implemented correctly by using the free Google Chrome extension called the Facebook Pixel Helper.
You can also use this extension to see if your competitors have installed a pixel on their site!
If they don’t have a Facebook pixel, you can be certain they aren’t properly measuring the return of their Facebook and Instagram advertising or building a website retargeting audience. If they do, then it might also be worth checking out the Facebook Ads Library to see what kind of ads they’re running.
2. Retarget Your Website Audience with Paid Ads
Now you’ve installed your Facebook Pixel, you can create a Website Custom Audience, which will let you retarget website traffic for up to 180 days.
The worldwide average website conversion rate across all industries is 2% to 3%.
The 97% to 98% of your website audience that didn’t buy might be your greatest opportunity to grow your business!
Think about it… they were curious enough about your solution to learn more about how it could help them. It’s just like in a brick and mortar retail store. Say someone has walked into your (online) clothing store to browse and potentially buy something.
Now, if they leave your store without purchasing, imagine if they went to lunch and overheard one of your best customers tell them how your product changed their life. This is exactly what you can achieve online through a website retargeting ‘customer testimonial’ ad.
Say this didn’t work… imagine if they were about to leave the shopping centre and right at the exit you had a little store setup. Hanging on the coat hangers in this store were the exact products they picked up to look at in-store, and above these products is a sign that read “Still thinking about these items? Join our VIP membership for free and get 25% off your first purchase! Also, don’t forget you can buy now and pay later in four fortnightly payments with AfterPay.”
This is what you could be doing if you were running Facebook Dynamic Ads.
The great thing about this website retargeting audience is that it doesn’t matter how people arrived at your site, whether from Google, a Facebook ad, or because they met you at a networking event and wanted to learn more… if they arrive on your website and you have a Facebook Pixel in there, you can target them with ads for 180 days.
3. Optimise Facebook Campaigns Based on Website Events
Your brand awareness campaign must lead to an interest in the solution you provide. If you’re generating interest in the solution you provide, you want to know if people are enquiring about it or purchasing it. You can’t do this effectively without implementing your Facebook Pixel and tracking actions that occur on your website.
These events can be created through a variety of methods, including:
- Google Tag Manager
- Facebook Event Setup Tool
- Directly through eCommerce platforms (Woocommerce, Shopify etc)
The common actions we track on our own website through our Facebook Pixel include:
- Clicks on call-to-action buttons
- Clicks on our hyperlinked contact email
- Clicks on our phone number to call us
- Subscribers to our blog
- Form submissions on our Contact page
- 30 Seconds time on page.

Each of these events plays a significant role in how we optimise our campaigns at each stage of our customer journey.
For an eCommerce store, you’re able to track the number of actions, the total cost per action, and the total value of those actions. For example, the number of website visitors adding your products to their cart, the total cost per add to cart, and the total value of products that have been added to cart.
4. Get Pixeling!
After you’ve implemented the Facebook pixel and set up the above features, you’ll notice conversations about Facebook and Instagram advertising change from “oh that’s interesting”, to “look at the quality of this cold audience compared to that one”, “look how much revenue / how many enquiries this ad is generating compare to that one” and “okay, let’s start scaling these campaigns because now we know we’re making a profit from them”.
Now if you haven’t already, get that pixel in your website, build your website retargeting audience and create those events!
P.S. Wondering where the opportunities are in your social media marketing and what it would look like for us to take care of it for you?
Book straight into my calendar by clicking here.